Hi, I was just going to pull the trigger on the C3d mini bundle and see it is out of stock
Hi, I was just going to pull the trigger on the C3d mini bundle and see it is out of stock. Since I have been out of town and don’t know when the notice when up… is there any update?
Are we still 2-3 weeks out. Has it been moved back or pushed up? Just being curious here?
Should I go ahead and order for a backorder/wait list - for example because first come first serve, or does it matter if I wait?
Side Milliamp meter Q. Does the terminal marked with the “-“ have the wire go directly to the tube? Y/N The one I received has the “-“ mark on the “to tube’s cathode” notation in the image below. This is mine: https://www.ebay.com/itm/DC-20mA-Analog-Needle-Panel-DC-Current-Ammeter-85C1/301831885863?hash=item4646951427:g:uIYAAOSwHPlWeWF-:sc:USPSFirstClass!37129!US!-1
Which would mean the unmarked terminal “+” would go to the PSU. I ask only because I have seen confusing info - at least to my limited thinking:-) and want to be sure.
I used this image http://lensdigital.com/home/wp-content/uploads/2015/11/ammeter_back_text1.jpg as reference. On my mA the terminal marked with the “-“ is on the right side terminal in the image.
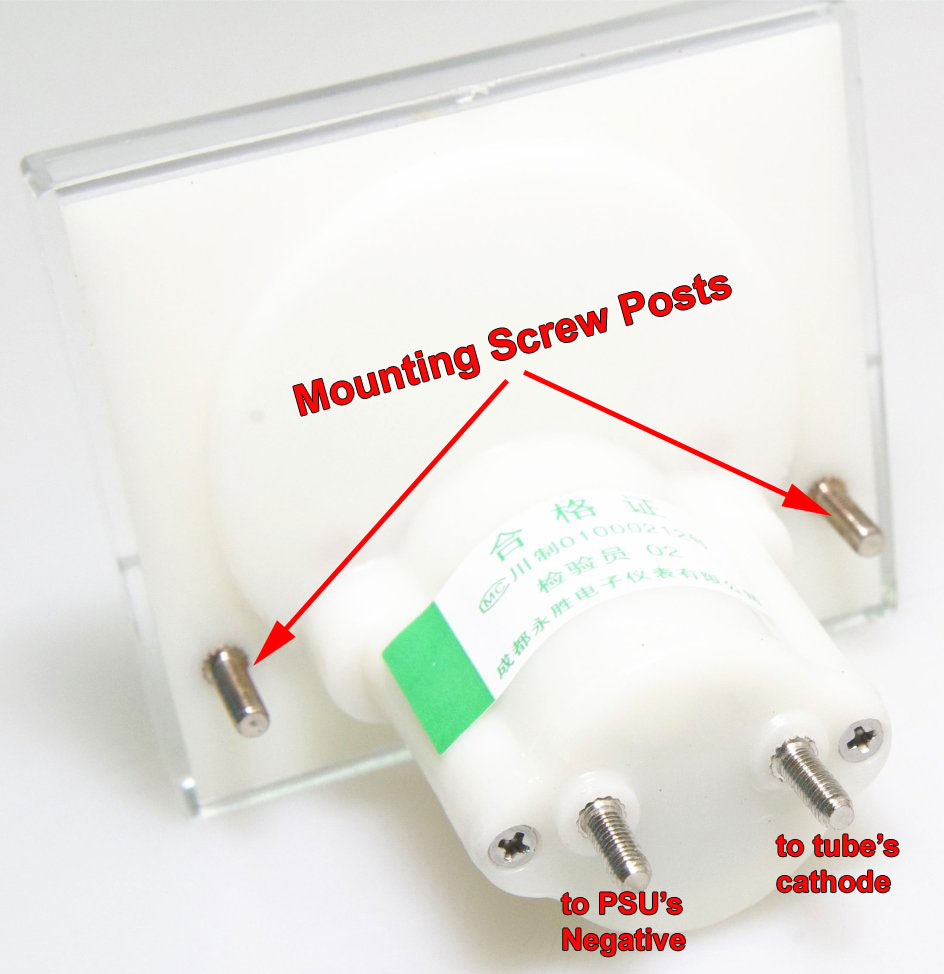
Thank you in advance:-)
“Em W”
Ray Kholodovsky (Cohesion3D) October 22, 2018 18:54
It is around 2 weeks out. I will update that statement on the product page as I know more. I would recommend waiting.
Mal Riverine November 20, 2018 15:55
To your ammeter question - Yes the Cathode side goes directly inline with the “-“ to the tube. I will add some machines have an insulator of some sort in line as well (round ceramic tube)…its not necessary, but good to leave in line. You will place the meter (cathode side) behind this. In lay term, rum the neg off the psu directly to the PSU side of the meter (throw on some liquid electrical tape after you do for good measure) then from the cathode side of the meter to the ceramic insulator (this is not polarized so which ever side) then to the tube.
And yes the “+” of the tube must go directly to the PSU. Below I add a few stress points for making these connections.
Let me add an important note here if you dont want a short or some cool lightning around your case… and this is just suggestion…. most of the PSU’s have aluminum wire. So first be careful stripping it, place a couple different size heat shrinks on the wire first one to go over the other, but also a stiff piece of tubing. I used 1/2” OD 3/8” ID to go over the splice and secure in place with electrical tape. The splice will be absent of the plastic inner insulation tube that helps protect it. That included flex fracture or breaking because you flexed it too much while trying to seat the tube or do other stuff. I know that more than 2 cents worth. but just my point.
Imported from Google+ — content and formatting may not be reliable